Wednesday, November 11, 2020

Install AWS CLI on Centos

 Today we will look at installing AWS CLI on Centos, i installed on one of the EC2 instances recently and will share the steps as below:


1. Download AWS CLI:


url "https://s3.amazonaws.com/aws-cli/awscli-bundle.zip" -o "awscli-bundle.zip"


2. Once downloaded, we need to install the zip, but first need to unzip. IN my case unzip was not installed on the host , hence i have downloaded and installed as below:


yum makecache


yum install unzip


3. Once done use unzip to unpack the downloaded bundle:


unzip awscli-bundle.zip


4. Next step is to install :


./awscli-bundle/install -b ~/bin/aws


........


You can now run: /root/bin/aws --version


Refer AWS documentation as well to get further clarity on the steps/versions


Wednesday, November 4, 2020

Install mysql 8.0 on Centos 7

 Today we will look at installing mysql 8.0 on centos 7, i created a new ec2 instance having centos 7.0 and then installed mysql 8.0.

to install mysql 8.0 follow the below steps:

here i have used yum to install 8.0 edition:

1. yum localinstall https://dev.mysql.com/get/mysql80-community-release-el7-1.noarch.rpm

.............

...........

Running transaction

  Installing : mysql80-community-release-el7-1.noarch                                                                                                                                                   1/1 

  Verifying  : mysql80-community-release-el7-1.noarch                                                                                                                                                   1/1 


Installed:

  mysql80-community-release.noarch 0:el7-1                                                                                                                                                                  


Complete!


post this we need to install :


user@instance]# sudo yum install mysql-community-server

Loaded plugins: fastestmirror

Loading mirror speeds from cached hostfile

 * base: d36uatko69830t.cloudfront.net

 * extras: d36uatko69830t.cloudfront.net

 * updates: d36uatko69830t.cloudfront.net

mysql80-community                                                                                                                                                                    | 2.6 kB  00:00:00     

mysql80-community/x86_64/primary_db                                                                                                                                                  | 128 kB  00:00:00     

Resolving Dependencies

--> Running transaction check

....................

................

Installed:

  mysql-community-libs.x86_64 0:8.0.22-1.el7                      mysql-community-libs-compat.x86_64 0:8.0.22-1.el7                      mysql-community-server.x86_64 0:8.0.22-1.el7                     


Dependency Installed:

  mysql-community-client.x86_64 0:8.0.22-1.el7                     mysql-community-client-plugins.x86_64 0:8.0.22-1.el7                     mysql-community-common.x86_64 0:8.0.22-1.el7                    


Replaced:

  mariadb-libs.x86_64 1:5.5.64-1.el7                                                                                                                                                                        


Complete!


user@instance]# systemctl start mysqld


this should start mysql service


The temporary root password can be found in the mysql log file and that can be used to login to the server.


however in this version, when we login with the given root password it will ask to reset this using 'alter command'.


Thursday, October 22, 2020

Upgrading Mariadb from 10.1 to 10.3 on Centos

To upgrade Maraidb from 10.1 to 10.3 use the steps mentioned on Mariadb Website, i followed the same and was able to successfully upgrade the database without facing any issues.

I will share below, it is always recommended to go through the official documentation is detail to understand what new features are available post upgrade and what will become obsolete.

As a first step ensure to have a full DB backup before starting any activity.

1. Modify the yum repository configuration to point at install 10.3 Version:

# MariaDB 10.3 CentOS repository list

# http://downloads.mariadb.org/mariadb/repositories/

[mariadb]

name = MariaDB

baseurl = http://yum.mariadb.org/10.3/centos7-amd64

gpgkey=https://yum.mariadb.org/RPM-GPG-KEY-MariaDB

gpgcheck=1


2. Next step is to stop running mariadb Database:

 Systemctl stop Mariadb


3. Uninstall the old/existing version from the server:

yum remove mariadb mariadb-server

This should remove existing installed software, it will not remove any of the existing Data related files

4. Once above is done install the new Version of Mariadb 10.3 using yum:

yum install mariadb mariadb-server


5. After successful installation edit my.cnf/server.cnf to make any changes as per the setup

6. Start Mariadb, it should start and monitor logs for any errors

 systemctl start mariadb

7. The last step is to run mysql_upgrade command from unix prompt, this will ask for root password or a user having equivalent privileges can also be used

mysql_upgrade does two things:

  1. Ensures that the system tables in the mysql database are fully compatible with the new version.
  2. Does a very quick check of all tables and marks them as compatible with the new version of MariaDB .

At the end the output will be OK, and we are all done


Thursday, June 4, 2020

Creating MYSQL Database on AWS RDS

Today i created an MYSQL database on AWS RDS, have been thinking of doing this from quite some time and  got sometime to work on this one. RDS is  managed service from amazon , means you can create a database from AWS console , but the underlying servers/OS is managed by Amazon.

Let's check the  the process followed for the same:

Login to AWS console and click on databases:


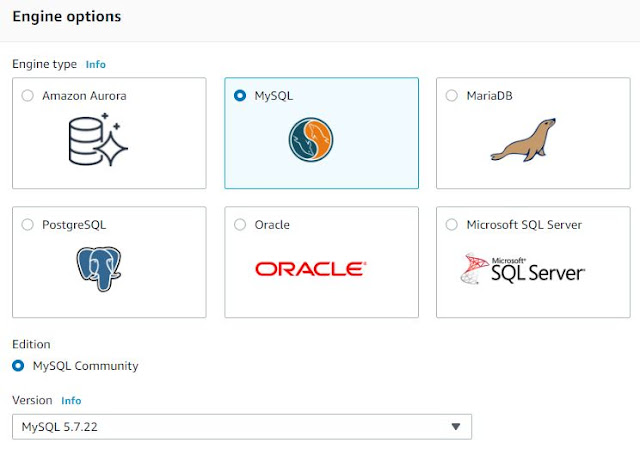
Click on Create Database and you will see many database, i chose MYSQL for my purpose


Next step is to select template, to chose if this database is for production,dev/test or free tier. based on your selection different features and pricing will be enabled accordingly


Next choose CPU, memory ,storage required 


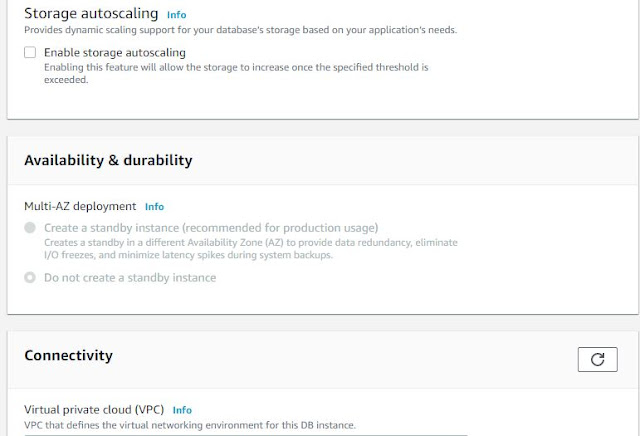
Next is to select availability and scaling if requires, since i have chosen free tier this option is disabled for me.


Next step it to choose authentication method,i chose password


while  clicking on additional configuration from above, Next steps are to set database name ,parameter group,option group , backups, retention, monitoring, logs enabling..


Once all done click create and you will see DB getting created.


This will take a few minutes and once done we can connect to RDS using endpoint given on the console:


mysql -h mysql.endpoint.rds.amazonaws.com -P 3306 -u mymasteruser -p

After that you will see a prompt like :

Welcome to the MySQL monitor. Commands end with ; or \g. Your MySQL connection id is 320 Server version: 5.7.22-log MySQL Community Server (GPL) Type 'help;' or '\h' for help. Type '\c' to clear the buffer. mysql>


And we are Done, Happy Learning as Always


Saturday, May 30, 2020

Creating SQL Server on Azure Cloud

Today i created an SQL Server Database on Azure cloud, Now a days many organisations are increasingly moving to cloud on various databases. I thought of trying SQL Server today and am still exploring all the options provided in azure for SQL server.

I captured some screenshots for the same and can outline the process:

In azure portal go to Databases and click on SQL Servers, the click create.
  
     The below screen will appear, Provide the resource group, Database Name and Server name. To create a server click on Create new and a new screen will appear 


In this screen provide server-name,username,password,location 


 You will need to check storage/compute option, do click and check how many DTU's and Disk space is required since you will be charged for the same. I chose a basic one for my testing 


Once done next page will be to validate network connectivity, i clicked on public endpoint to allow my machine to access the database (this, myip needs to be configured in firewall setting as well) 


Next step is Data source - if you want to create a blank, sample database or import from an existing one. i chose to create sample DB.


At the end click review and create and the deployment will take place, this takes a few minutes.


Once Done we can connect to your database using query editor and giving username/password that was given during DB Creation.


Sunday, May 24, 2020

Mounting azure file share on your linux/unix machine

So once you create file share in azure, and need to access from linux server how to do that?

In azure portal , click on the file share and you will get an option named - Connect

Go to linux VM , you will see a script that needs to be run on azure linux vm to mount the fileshare.  

In my case i ran the script on my azure vm and file share got mounted without any issues.


Filesystem syntax will be in the form of :

//yourstorageaccount.file.core.windows.net/filesharename


Saturday, May 16, 2020

Azure Storage - Containers,blobs,file shares

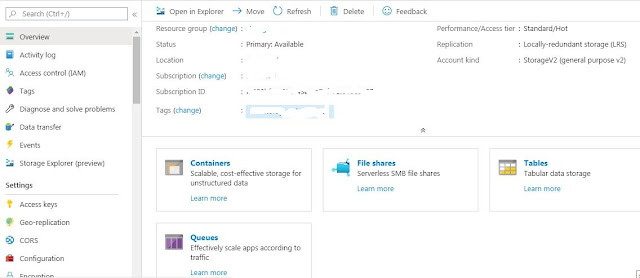
Microsoft Azure Cloud can store data in a storage account, once a storage account is created we get different options to store data:

1. Containers for blob storage - Blob storage is designed for storing unstructured data , designed mainly for images, or documents directly from browser , video, audio,storing data for backups and recovery etc..

To create blobs, click on container and you will can add new container to hold blob data along with access level


Friday, May 15, 2020

aws s3 command to list and copy files from and to AWS s3 Bucket

AWS S3 command is used to copy data from AWS bucket to a location - say a mountpoint on unix 

box or vice-versa or buckets

This command is similar to Unix cp command. I used aws s3 ls and aws s3 cp to copy files from S3 bucket sometime back.

buckets to a mount point in the server. 

Below are some examples and syntax for the same:

1. List directories and files :

 aws s3 ls s3://path/file 

ls command with list objects and common prefixes under a specified bucket and prefix.

2. List content in a directory:

aws s3 ls s3://path/directory --recursive 

with above command all contents in directory are listed.

3. Copy files from S3 bucket to a mount point :

aws s3 cp://file path /tmp

in above command aws s3 copy command copies a file from S3 bucket to a local mountpoint /tmp

4. Copy files from mount point to s3 bucket:

aws s3 cp /tmp/file1.txt s3://path/fil1,txt

5. Delete files in bucket :

aws s3 rm s3://path/file1.txt


6. Display file with file size in human readable format:

aws s3 ls  s3://path --recursive --human-readable --summarize


Thursday, May 14, 2020

Mariabackup for taking backup of mariadb databases

Today i have taken backup using mariabackup, with this utility you can take online full and incremental backups.
Below are the steps to be followed:

1. Create user as for backup:

MariaDB [(none)] > Create user 'mariabackup'@'localhost' identified by 'password';

MariaDB [(none)] > Grant reload,process,lock tables, replication client on *.* to 'mariabackup'@'localhost';

2. Install Maria backup:

#yum install MariaDB-backup

you will observe packages being installed and at the end will get message Complete !

3. Create a directory for backups, in my case i created /backup

4. take backups :

   #mariabackup --backup --target-dir=/backup --user=mariabackup --password=password

Backup will start and at the end you will get a message completed OK !

now we can go to the directory and check files created, you will see multiple files along with DB files that have backup related info -

backup-my.cnf,  xtrabackup_info, xtrabackup_checkpoints 


Wednesday, May 6, 2020

Mariadb Installation on Centos7

I recently installed Mariadb10.0 on Centos , this was on Azure. To start with i have created a VM on AZURE with centos and post Completion installed Mariadb.

Installing mariadb is fairly simple and below are the steps to be followed..:

1. Enable Mariadb Repository , create a file /etc/yum.repos.d/MariaDB.repo and add:
      name = MariaDB
    baseurl = http://yum.mariadb.org/10.4/centos7-amd64
    gpgkey=https://yum.mariadb.org/RPM-GPG-KEY-MariaDB
    gpgcheck=1

2. Next step is to install MariaDB server and Client packages , use yum:

     # yum install Mariadb-Server MariaDB-Client 

    this will download the required packages and complete the installation. Galera packages are also installed as it comes bundled in this version.

3. Start Mariadb :

    # Systemctl start Mariadb
    # Systemctl status Mariadb

At this point Mariadb should be up and running. Configuration file can be found in /etc/mariadb.d/server.cnf and default directory 
is in /var/lib/mysql.

With Mariadb 10.4 you can login to database without root password:

  #mysql -uroot

  Mariadb> 


Saturday, April 25, 2020

Docker Commands

I worked on docker and am sharing basic docker commands for reference:

1. To check running containers : This command lists running docker container

$ docker ps

CONTAINER ID        IMAGE               COMMAND                  CREATED              STATUS              PORTS                  NAMES
df3589d324rg        ubuntu           "docker-entrypoint.s…"   About a minute ago   Up About a minute   80    ubuntu
2e0eabc266d9        postgres            "docker-entrypoint.s…"   5 minutes ago        Up 5 minutes        5432/tcp               db

2. To stop running containers: This command stops running container, i have taken first 4 characters of the first container from above commands

$ docker stop ContainerID

$ docker stop df35

3. To remove a container : After stopping the container, remove with the below commands

$ docker rm df35


4. Lists all the network

$docker network ls

NETWORK ID          NAME                DRIVER              SCOPE
eaa996cb5b14        bridge              bridge              local
f46cc1338e5a        host                host                local
9e826c05fcfd        none                null                local


Sunday, April 12, 2020

Jenkins Installation

Today am going to discuss about Jenkins installation.
Jenkins can be installed on both unix and windows, i recently installed on my windows 7 laptop and thought of sharing the process in detail with screenshots. 
First we need to download jenkins from website -

https://jenkins.io/download/

Select relevant option from the below, i selected windows:


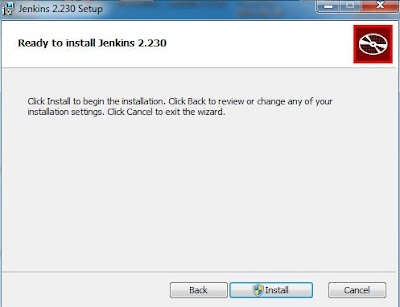
Once downloaded jenkin.msi needs to be run 


you will need to select installation location , i chose the default one :


Click on next to proceed:


few clicks our installation is completed 


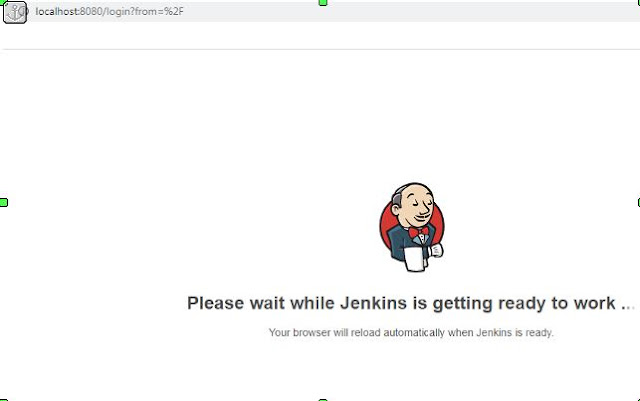
In next step jenkins will start it's configuration 

In next step jenkins installation need a password stored in a file as per the screenshot, navigate to the file and enter the password.


Copy the password and enter, post the jenkins configuration will proceed further:


In next step jenkins with download , install plugins to create new jenkins jobs


Once above is completed , create new user page will appear


Fill in above details and next page will give default URL:Port of jenkins. We can change the below as per the requirement.


Finally our configuration is completed 


Tuesday, March 31, 2020

MongoDB

I have worked on MongoDB for sometime and wanted to share some knowledge gathered during this time.

Saturday, March 21, 2020

Shell script to execute mysql query

We can run mysql queries via shell scripts, since this is required at times .

Say  a query is to be scheduled via crontab and shell script.


Here is a simple shell script example, as an example:


vi testscript.sh


-----------------------------------------------------------------------

#!/usr/bin/bash

DBUSER='username'

DBPASSWD='Password'

Query='show databases'   -- example query


mysql -u $DBUSER -p $DBPASSWD  <


$Query

EOF

----------------------------------------------------------------------

The above is a simple script to show databases and is executed with shell script..

# sh testscript.sh

We can schedule the above in crontab to run at a designated time.

Many such scripts can be written to automate daily tasks - backups etc..


Thursday, March 19, 2020

Executing mysql commands from unix command prompt

We can also run mysql queries from unix command prompt. This is useful in many cases, say i want to check status of db cluster or check running processes etc.

I am sharing a basic example here:


mysql -u username -p -e "show databases;"


The above command will ask for password and share output of current databases.


This is a quick way to get required information.

Wednesday, March 18, 2020

Maridb Galera Cluster

So after working on Oracle RAC, SQL Server Always-On and DB2 HADR now finally i have got a chance to get hands-on Mariadb Galera Cluster and i am amazed. The Galera cluster is an Active-Active cluster , what that means you can write on any node and data is available on all nodes, changes are getting replicated quickly across all nodes and it's just so simple to install while Oracle and other clusters take too much time..

Here i will list done a few commands to monitor Galera cluster status :


MariaDB > Show status like 'wsrep%';


+------------------------+-------+
| Variable_name          | Value |
+------------------------+-------+
| wsrep_protocol_version |       |
| wsrep_last_committed   |       |
| ...                    | ...   |
| wsrep_thread_count   

You will see a list of variables related to galera in the output displaying about Number of Nodes in the cluster, their ip addresses, Current status..etc..


Will write more about these in my next post related to Galera.


Select Into OUTFILE Mariadb/MYSQL to export data in csv format

At  times where we need to export Data into csv format in mariadb/mysql,

SELECT INTO OUTFILE will write resulting rows from a query into a file - csv..


Below is a simple example on this :


select * from table INTO OUTFILE  '/path/test.csv'

FIELDS TERMINATED BY ','
ENCLOSED BY ' " '
ESCAPED BY '\\'
LINES TERMINATED BY '\n';

Handling Null values -


Another thing we will notice is having /N in output where we have Null values in table, in few cases requirement is to have blank Fields instead of /N in output. in these cases we need to use IFNULL function in the query


example,


Select name, IFNULL (Date, ' ') from table INTO OUTFILE  '/path/test.csv'

FIELDS TERMINATED BY ','
ENCLOSED BY ' " '
ESCAPED BY '\\'
LINES TERMINATED BY '\n';

With the above we replaced Null with blank in the csv output.